Arduino Examples
7-Seg Display Program
Description
7-Seg Display is a more complex Arduino program that will allow you to display different numbers on a properly configured seven segment display. Code is provided to display a basic countdown, but functions are provided that will allow you to easily implement other ideas.
Materials
- Arduino
- Breadboard
- Seven Segment Display
- Jumper Wires
- Resistors
Instructions
- Paste the code below into the Arduino IDE
- Set up the breadboard and Arduino in the same configuration as the diagram below
- Compile and upload the code to the Arduino
- Start the Arduino
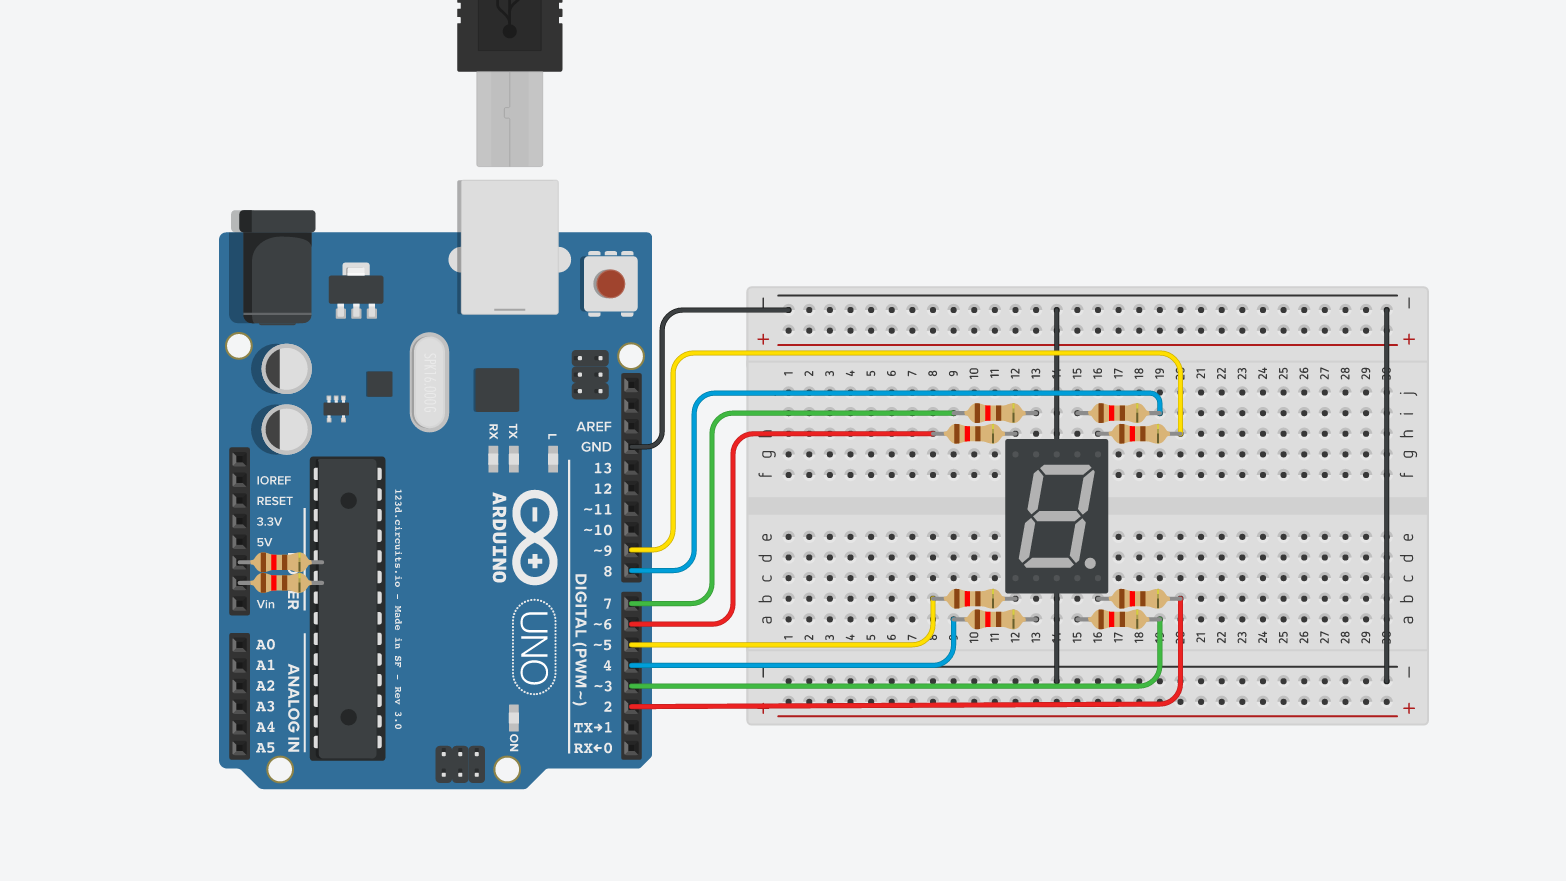
Circuit Diagram
Code
// This 2d-boolean array tells the display which sections to light up.
bool leds[10][8] = {
  {1,1,1,0,0,1,1,1}, // 0
  {0,0,1,0,0,0,0,1}, // 1
  {1,1,0,0,1,1,1,0}, // 2
  {0,1,1,0,1,0,1,1}, // 3
  {0,0,1,0,1,1,0,1}, // 4
  {0,0,0,0,0,0,0,0}, // 5
  {0,0,0,0,0,0,0,0}, // 6
  {0,0,0,0,0,0,0,0}, // 7
  {0,0,0,0,0,0,0,0}, // 8
  {0,0,0,0,0,0,0,0}, // 9
};

// This function sets pins 2 to 9 to an array of boolean values.
void setSevenSeg(bool ledArray[]) {
  for (int i = 0; i < sizeof(ledArray); i++) {
    digitalWrite(i+2, ledArray[i] ? HIGH : LOW);
  }
}

// This function makes sets the display to a certain number.
void setSevenSegDigit (int number) {
  setSevenSeg(leds[number]);
}

// The setup function runs once when the Arduino starts.
void setup() {
  // Sets pins 2 through 9 to output.
  for (int i = 2; i <= 9; i++) {
    pinMode(i, OUTPUT);
  }
}

// The loop function runs over and over.
void loop() {
  // Counts down from 10.
  for (int i = 9; i >= 0; i--) {
    delay(1000);
    setSevenSegDigit(i);
  }
}
7-seg-display.ino